Get Ready for Summer Garden Vegetables
Discover how to get your garden started before the last frost date.
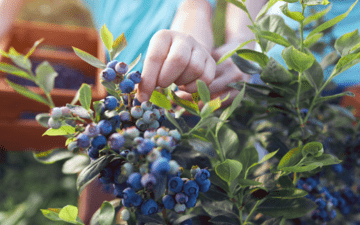
Eating more vegetables is a proven way to improve your health. Vegetables provide vitamins, minerals, antioxidants, and fiber. Consuming vegetables can lower your risk of many chronic conditions, such as heart disease, diabetes, and high blood pressure.
Prices of vegetables in stores have risen in recent years (along with most other grocery items). You can cut your costs and have plenty of fresh vegetables for meals and snacks by growing them yourself.
Vermont’s short summers mean that some vegetables like cucumbers, tomatoes, and peppers are best started indoors from seeds. They can be transplanted to your outdoor garden plot or large containers after the last frost date. Starting seeds indoors means you’ll have vegetables from your own garden earlier in the summer than if you plant the seeds outside.
Starting seeds indoors isn’t complicated or time-consuming and only requires a few items. We’ll give you a few tips to help you get started.
When to Start
A common question is when to start seeds indoors so the seedlings will be ready for transplanting at the right time. Using a planting calendar like this one will take the guesswork out of it. The calendar uses the average date of the last frost for your location to calculate the dates for starting seeds indoors, as well as when to transfer the seedlings outside.
What You’ll Need
The first thing you’ll need is seeds. You can find seed packets at many locations, including garden shops, hardware stores, and places that sell farm supplies. They’re also available online from seed suppliers. You can get seeds for free through seed libraries (often located in public libraries), local garden clubs, and community garden networks.
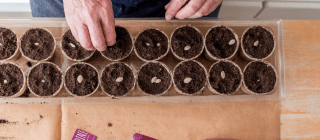
You’ll also need containers to start your seeds in. Seed starter trays with clear covers come in a variety of sizes, but you can also use items you already have around the house, such as empty plastic yogurt containers. Be sure to punch holes in the bottom of repurposed containers to allow water to drain out.
Next is some type of growing medium. Seed starter mix works the best, as it’s designed specifically to nurture seedlings. Potting soil can also be used, but garden soil should be avoided because it’s too dense for seedlings.
Seeds germinate better in a warm location, with a consistent temperature between 75 and 80 degrees. If you don’t have such a spot, you can use electric germination mats to provide extra warmth.
The last thing you’ll need is a source of light. A sunny, south-facing window can work, but your seedlings will do better with an artificial light source that stays on for 14 to 16 hours a day. LED or fluorescent shop lights hung one to three inches above the plants should produce good results. Look for full-spectrum or broad-spectrum lights that mimic natural sunlight. Bulbs marked as having a color temperature of 6500 kelvin are ideal. Hang the lights so they can be raised as your seedlings grow taller.
What to Do
Fill containers with growing medium and moisten with water. You may want to put containers in a tray to catch excess water as it drains off.
Place seeds into the growing medium according to the instructions on the seed packet. Cover the seeds with growing medium and add a little water. You’ll want to keep the seeds moist but not wet. It’s important to label containers with the seed names so you’ll know what they are later.
Place a clear cover over the planted seeds to help keep the moisture in. If you’re using your own containers, clear plastic bags will work great. If you see condensation on the covers, it’s a sign the humidity level is too high and you need to vent them to prevent seeds from rotting.
As the seedlings grow, thin out the weaker ones. Fertilize every two weeks using water-soluble plant food diluted to half strength.
Two weeks before the transplanting date, start helping your seedlings get accustomed to being outside. At first, place them outdoors in a shady spot protected from wind for a couple of hours. Each day, gradually increase the time they’re outside and the amount of sun they get until they can stay out all the time and are fully hardened off. Then they’ll be ready to be placed in your garden and continue growing into beautiful vegetables.
Would you also like to grow your own fresh herbs? Check out our blog post on starting an herb garden.